Getting a generator ready for the next storm or camping trip shouldn’t be stressful. A little carburetor maintenance goes a long way to keep your Champion generator or inverter running strong. Carburetors tend to gum up with stale fuel, debris, or even a little corrosion. When that happens, your generator can sputter, stall, or refuse to start. I will tell you how to clean and repair a clogged carburetor right at home, using common tools and supplies. By the end, you’ll know exactly, “How do you clean a clogged carburetor by hand?” and you’ll be ready the next time your generator needs a little TLC.
Preparing to Clean Your Carburetor
A little preparation makes this job safe and simple. Before you start taking anything apart, take a minute to set up your workspace. Think of it as gathering your “carburetor cleaning toolkit.”
Identify Your Model and Locate Resources
Champion generators and inverters come in many models. Each one may have slight differences in how the carburetor is attached or shaped, but the cleaning process is almost always the same. To make things easier,
Safety First: Fuel Valve and Drain Bolt
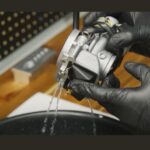
Fuel can be dangerous. Always work in a well-ventilated area, away from open flames and sparks. Wear gloves and safety glasses. Here’s how I handle the messy part:
Step-by-step before removing the carburetor:
- Turn off the fuel valve. This stops any new gas from entering the carburetor while you work.
- Locate the fuel drain bolt. It’s at the bottom of the carburetor. It may look a bit different depending on your unit, but it always sits at the lowest point to let gas out.
- Place an approved container under the carburetor. This is important to catch any old fuel that will drain out.
- Remove the drain bolt. Use the right size socket or wrench. Some fuel may spill, so be ready to wipe up drips with a towel.
- Let the fuel drain completely.
- Replace the drain bolt when finished.
This step keeps old gas from spilling everywhere and makes it safer to work on your carburetor.
Initial Cleaning of the Carburetor Exterior
Before diving into the inner workings, I always clean the outside first. This keeps dirt and grit from getting inside as I take things apart.
Tools Needed for Cleaning
- Compressed air
- Carburetor cleaner (or other aerosol solvent)
- Towels or rags
- Safety goggles and gloves
Lay a towel under the carburetor to catch fuel spills and debris. This helps keep your workbench clean and organized.
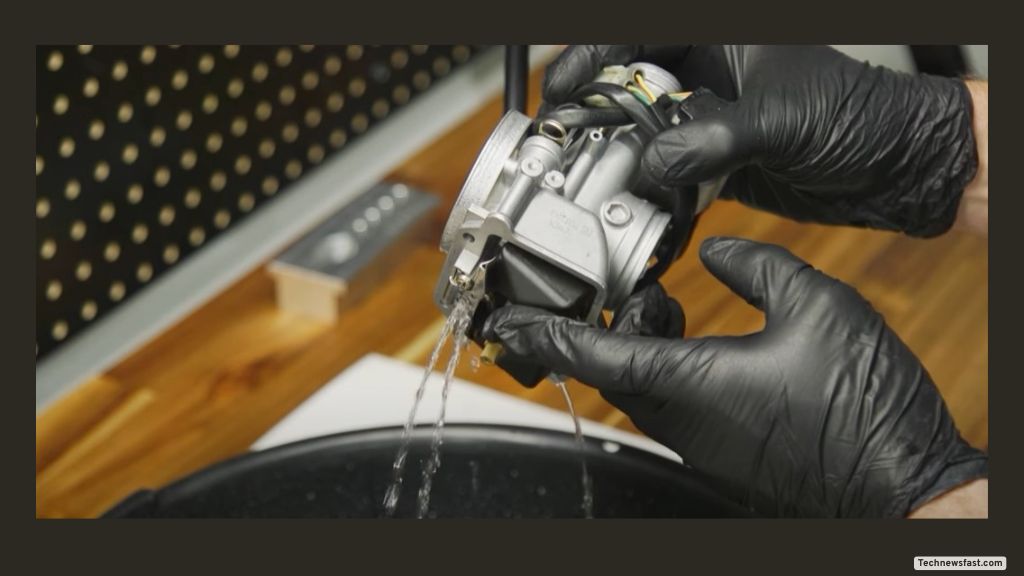
Cleaning Process
Start by giving the outside of the carburetor a good spray with carburetor cleaner. Let the liquid soak for a minute, then wipe away loose dirt and gunk. Use compressed air to blow out any stubborn dust or debris from crevices. Focus on cleaning around joints and moving parts, as grime can cause damage if it gets inside. Quick cleaning here can prevent headaches later.
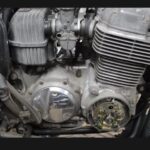
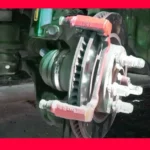
Disassembling the Carburetor for Deep Cleaning
Once the outside is clean, it’s time to get hands-on. Taking apart the carburetor may sound tricky, but if you move step by step, it’s straightforward.
Removing the Float Bowl and Solenoid (If Applicable)
The float bowl sits at the very bottom of your carburetor. It holds a small reserve of fuel that feeds the engine. Some Champion units have a solenoid attached—an electrical valve that controls fuel flow.
- If your unit has a solenoid, note the orientation of the wiring and the drain bolt. This will make reassembly easier.
- Use the proper tool (like a socket or wrench) to remove the bolt that fastens the float bowl.
- If there’s a solenoid, unscrew it with the matching hardware. Keep track of small screws and notice how things fit together.
- Gently remove the float bowl and inspect it for gunk, sediment, or corrosion.
- Remove the solenoid bolt and clean it with a thin wire and compressed air. If there are holes or a center passage, poke through and spray with cleaner to ensure everything is open.
- Use a cotton swab with carb cleaner to gently wipe the solenoid’s shutoff pin.
Cleaning the Float Bowl
Spray the inside of the float bowl with carburetor cleaner. If you spot sediment, use a small screwdriver or brush to loosen the grime. Stubborn rust may take a little elbow grease. Scrub well and blast with compressed air until the bowl is spotless.
Removing and Cleaning the Float and Float Needle
The float is a tiny plastic or metal part that rides on fuel, opening or closing the needle valve as fuel levels go up or down.
- Find the thin pin that holds the float in place. Slide it out carefully.
- Lift out the float, and you’ll see the float needle underneath—a small part with a rubber tip.
- Use a cotton swab soaked in carb cleaner to wipe out any dirt inside the needle seat (the hole where the needle fits).
- Gently clean the rubber tip of the float needle.
- Check both for damage—if the tip is worn or rigid, you may need to replace the float needle.
Thorough cleaning here helps control fuel flow. A sticking float needle can cause all kinds of trouble, including hard starts or flooding.
Accessing and Cleaning Carburetor Jets
Jets are the tiny tunnels that meter fuel. Even the smallest bit of dirt can clog them. Cleaning these is the heart of “How to Clean and Repair a Clogged Carburetor” at home.
Locating and Removing the Main Jet
Most Champion carburetors hide the main jet inside the central post at the carb’s bottom. Yours might be on the side, depending on the model.
- Use a flathead screwdriver to loosen the main jet. Be gentle. If you strip it, it’s a pain to get out.
- If the main nozzle above the jet is removable, pop it out. Sometimes, old gas sticks it in place. Open the choke, reach through the opening, and use a screwdriver to nudge it loose.
- If you’re cleaning a Honda-style Champion carb, the process is similar—just remember to note how parts fit together for smooth reassembly.
Cleaning the Main Nozzle and Main Jet
I always grab a thin strand of wire (like from a wire brush or twist tie). Here’s how I clean these critical parts:
- Insert the wire through every hole of the main nozzle and main jet.
- Spray thoroughly with carb cleaner.
- Blow them out with compressed air.
- Repeat if needed until all openings are clear.
This is “How do you clean a clogged carburetor by hand?” at its core—physical scrubbing, soaking, and blowing out all gunk.
Locating and Cleaning the Pilot Jet
The pilot jet usually sits on the carburetor’s side, beneath a black Phillips screw or a silver capture plate.
- Find the choke side of your carburetor.
- Spot the small hole that leads toward the pilot jet.
- Spray carburetor cleaner through this passageway. A fine spray should come out of tiny holes in the Venturi (the throat of the carburetor).
- Flip the carburetor around and spray through the hole on the opposite side to help clear debris.
These passages are small—be patient and use short bursts of cleaner for best results.
Removing and Deep Cleaning the Pilot Jet
- Loosen and remove the Phillips screw or capture plate to access the pilot jet.
- Use needle-nose pliers to carefully pull the pilot jet out.
- Run your thin strand of wire through the jet’s holes, then spray with cleaner and blast with air.
- Spray carb cleaner down the hole where the pilot jet sits to clear any passage connecting to the carb’s center post.
These steps make a huge difference when dealing with a clogged carburetor. If you’ve wondered, “How do you clean a clogged carburetor without fancy tools?” —A wire, cleaner, and patience go a long way.
Reassembling the Carburetor
Putting it all back together is just as important as taking it apart. Each part must fit correctly to avoid fuel leaks or engine trouble.
Reinstalling the Pilot Jet
Start with the pilot jet. Line up its hole with the passage you just cleaned, then tighten the capture plate or Phillips screw with gentle pressure. Only tighten enough to secure it in place—don’t crank it down hard.
Reinstalling the Main Nozzle and Main Jet
Drop the main nozzle into the center post in the correct orientation. Next, insert the main jet and turn it in with a flathead screwdriver. Don’t overtighten. Just a snug fit is enough.
Reinstalling the Float and Float Needle
- Place the float needle onto the float’s tab.
- Carefully slide the needle back into its seat.
- Add the float and secure it using the float pin.
If your float or needle seems sticky or damaged, now’s the time to replace it.
Reattaching the Float Bowl and Solenoid
- Make sure the rubber O-ring is sitting clean and undamaged.
- Orient the float bowl as it was before.
- Tighten the bolt at the carburetor’s base snugly.
- If your model has a solenoid, connect it now, checking that wires are oriented as they were.
Conclusion
Cleaning and repairing a clogged carburetor isn’t rocket science, but it does take patience and care. Whether you want to know “How do you clean a clogged carburetor at home?” or have wondered, “How do you clean a clogged carburetor Honda style?” The answer is often the same—take it apart gently, clean every passage with wire and carb cleaner, and reassemble with attention to detail.
Read also.