A clean windshield is more than just a luxury; it’s a safety must. Suddenly losing your washer spray can be frustrating, especially after refilling the reservoir. If your wiper fluid isn’t spraying after a refill, your windshield washer pump may be the culprit. But you don’t need a mechanic for this repair. Learn how to fix a broken windshield washer pump—whether you drive a Toyota, Honda, or Ford. Get ready to tackle a job that could save you time and a good chunk of money.
Diagnosing the Washer System Issue
A windshield washer pump not working can result from several common problems. Before you think about replacement, it’s smart to check each part systematically.
Checking Washer Fluid Level
Start by popping the hood and finding the washer fluid reservoir. This is usually a white or translucent plastic tank on one side of the engine bay. Look for the low indicator line stamped on the reservoir. If the fluid is below this mark, your washer spray will stop working. Most people discover the issue right after refilling, only to realize wiper fluid is still not spraying after the refill. Slightly low fluid may still let the pump suck in some water, but air pockets can keep your spray from working.
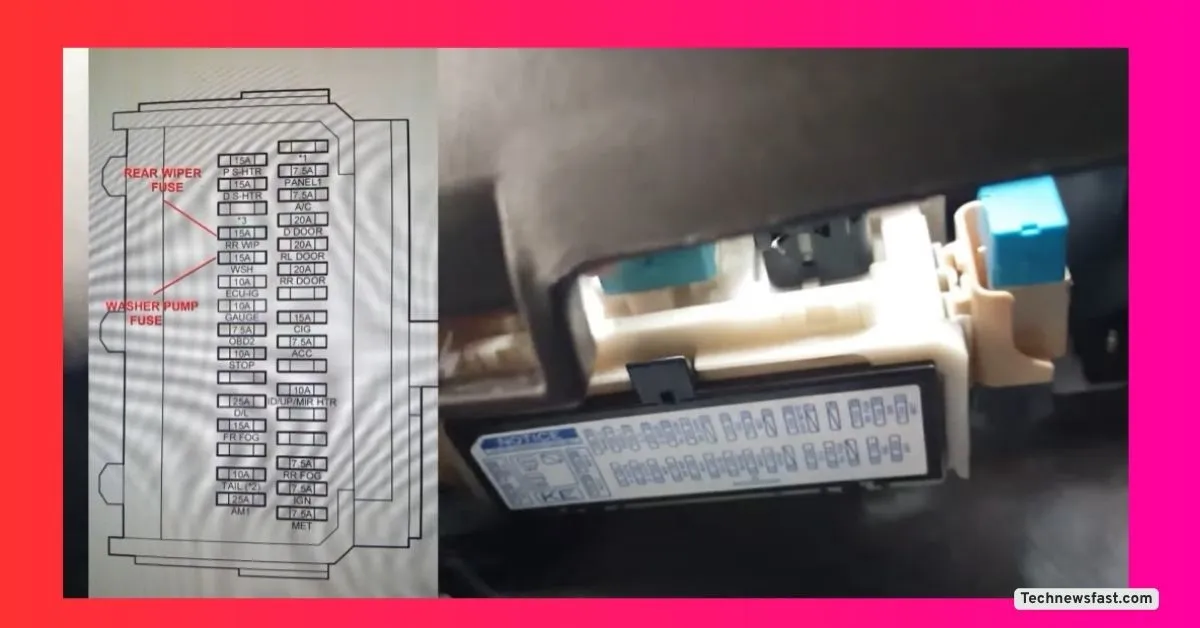
Inspecting the Washer Fuse
Every windshield washer system has a dedicated fuse to protect the circuit. If your pump is dead silent, a blown fuse is a likely suspect.
- Look under the dashboard, on the driver’s side, and remove the fuse box cover.
- Find the washer fuse: it’s usually in the back row, fourth from the left end.
- Use a fuse puller (commonly found in the under-hood fuse box) to remove the fuse.
- Hold the fuse up in good lighting. A clear, unbroken wire inside means it’s probably good.
- For added certainty, use a multimeter on the continuity setting:
- Set the multimeter to the continuity setting (often marked by a sound wave symbol).
- Touch the two-meter leads together and listen for a beep, which checks the meter.
- Touch one lead to each end of the fuse. A beep means the fuse is good.
- Reinstall the fuse and snap the cover back in place.
If the fuse checks out, your problem likely lies with the pump itself.
Preparing to Replace the Washer Pumps
Now that you’ve eliminated fluid and fuse problems, you’re ready to replace the pump. This process covers how to fix a broken windshield washer pump on a Toyota Sienna, but the method is very similar on Hondas, Fords, and many other cars.
Ordering Replacement Pumps
Before starting any hands-on work, order a compatible replacement pump. For a Toyota Sienna, check out this OEM-style washer pump on Amazon. Always double-check fitment for your vehicle model; this is especially important for anyone needing to know how to fix a broken windshield washer pump on Honda or Ford vehicles, since connectors and mounting points differ. If both your front and rear washers aren’t working, you may need two pumps.
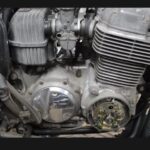
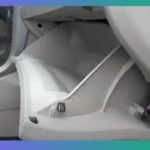
Vehicle Setup and Accessing the Pumps
To make space to work in the fender well, turn the front wheels fully to the right. This gives better access to the lower edge of the fender well and washer reservoir.
Remove these fasteners in sequence:
- Two fasteners from the fender well.
- Three fasteners from under the van.
Once the fasteners are out, gently pull back the inner fender lining. You’ll now see the washer reservoir and both pump units.
Removing the Old Washer Pumps
Taking out your broken washer pump is simple, but a few small details make it safe and less messy.
Disconnecting Electrical Connectors
- Make sure the car is off and the keys are out of the ignition.
- Find the pump you want to replace (front or rear: the front is usually toward the left).
- Press down on the thumb tab and unplug the electrical connector.
Safety Tips:
- Always disconnect power while working on electrical parts.
- Double-check you have unplugged the right connector.
Detaching Pump Hoses
- Reach for the hose attached to the left side of the pump.
- Pull it off gently. Some fluid may drip out, so keep a small towel or container handy.
Extracting the Pump
- Twist and pull the pump out of the reservoir. It should come free with a bit of force.
Note: Removing the pump can cause washer fluid to drain from the reservoir. Be ready for a small spill and clean up right away to avoid slipping.
Comparing Old and New Pumps
With the old and new pumps in hand, compare them closely.
- Old pump: May have a screen (often glued in place) over the fluid inlet.
- New pump: Should look nearly identical but may not come with the screen attached.
- You may find green slime, buildup, or a clog inside the pump inlet. This gunk blocks water flow and leads to washer failure.
- Pry off the screen carefully with a small screwdriver. Clean it thoroughly.
- Use a touch of super glue gel to attach the screen to the new pump, if needed. Apply glue only to the screen’s thicker legs. Allow it to set for a few minutes.
Installing the New Washer Pumps
Now it’s time to install your new pump and make the whole system work like new.
Preparing the Reservoir and Grommet
First, flush out the washer reservoir using pressure from a hose or nozzle. This helps clear out debris or sediment that could cause future clogs.
Focus on the rubber grommet where the pump inserts:
- The flat side faces outward (toward you).
- The beveled side goes inside the reservoir.
Make sure the grommet is seated well to prevent leaks.
Installing the Pump
Slide the pump’s port into the grommet (with the port facing left, toward the driver’s side for most vehicles). Push firmly until it seats.
Reconnect the hose to the pump’s inlet and the electrical connector to the pump. Firm, positive pressure helps both click back on securely.
Testing for Leaks and Functionality
Before buttoning everything up, fill the washer reservoir with water or proper washer fluid. Carefully check for leaks around the pump and hose connections.
Run through this quick checklist:
- Fill the fluid, topping up to the recommended mark.
- Look for leaks around the grommet and hose.
- Turn on the car and activate the washer spray.
- Watch for strong spray from front and rear nozzles.
If you see leaks, reseat the pump or grommet and check your connections again. If you’re getting good spray, move on to reinstalling the fasteners and inner fender lining.
Repeating the Process for the Rear Washer Pump
Replacing the rear pump follows the same process as the front. On some vehicles, rear washers use a dedicated pump, while others share a reservoir or lines. For the 2004 Toyota Sienna shown here, simply repeat the steps for the rear pump if needed.
Windshield Washer Pump Replacement Cost and DIY Savings
Professional windshield washer pump repair near you may cost anywhere from $100 to $250, sometimes more for certain models or if both front and rear are replaced. The pump itself typically costs $10 to $35 when you order it online. By doing the work yourself, you save the cost of shop labor and often finish the job in less than an hour.
For comparisons:
- How to fix a broken windshield washer pump Toyota models usually require the steps described above.
- How to fix a broken windshield washer pump Honda and how to fix a broken windshield washer pump Ford will look very similar, though pump removal and reservoir access may differ slightly. Always check your service manual for tips on your car.
Recommended tools for this repair:
- Fuse puller or needle-nose pliers
- Basic screwdriver set
- Multimeter (for fuse checking)
- Small container or towel (for fluid spills)
- Super glue gel (for screen attachment)
- Pressure hose or nozzle (for flushing reservoir)
Conclusion
Learning how to fix a broken windshield washer pump puts you in control of your vehicle repair costs and builds confidence for other jobs down the road. Whether you’re fixing a pump on a Toyota, Honda, Ford, or another make, the steps are simple and direct and can be tackled with basic tools. You avoid the windshield washer pump replacement cost from the shop, gain useful car repair skills, and get your wiper fluid spraying strong again.